

Microsoft Teams - How to create a Bot using C#
In this article, we will create a Microsoft Teams Bot developed in C#, using the Microsoft SDK. Then we will host it in Azure and publish it in your company’s Teams. This way you can easily adapt the C# code to improve the discussion with your Bot.
The steps are :
- Developing a Bot in C#
- Test the Bot locally
- Publish the Bot in Azure
- Create a Bot Channels Registration
- Setting up the Teams channel
- Create a deployment package for Teams
- Install the package in Teams
Developing a Bot in C#
To create a Bot, there are several templates offered by Microsoft. The simplest is to use the Echo template which contains an API that returns the text written by the user.
-
Install the SDK .Net Core version 3.1 or more.
- Install the C# model of the Framework Echo bot.
dotnet new -i Microsoft.Bot.Framework.CSharp.EchoBot - Create a Bot project using the following command.
dotnet new echobot --name MyEchoBot - Open the project with Visual Studio or VSCode and start it in Release mode. Your browser displays a page Your bot is ready! and indicates that it is possible to test the Bot locally, via the emulator.
In Debug mode, an Object reference not set error may occur the first time the test emulator is connected.
Test the Bot locally
-
Download and install the Bot Framework Emulator.
-
Press the [Open Bot] button and use the URL http://localhost:3978/api/messages.
-
You can chat with the Bot: the message “Hello” is displayed by the Bot, in return.
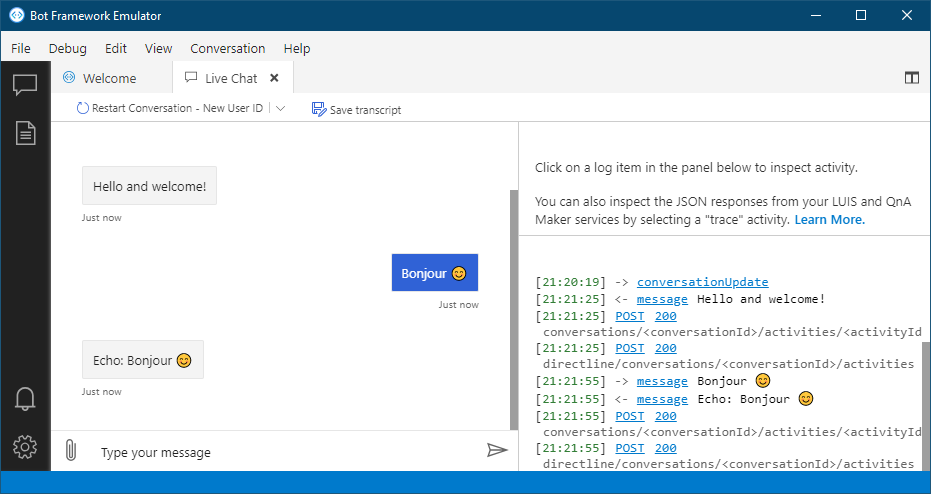
The welcome message and returns are managed via the Echo/EchoBot.cs class.
Publish the Bot in Azure
Once the local tests are completed, you can deploy this code in an Azure web application.
-
In Azure, create a new Web App that supports the .NET Core 3.1 stack.
-
In Visual Studio, publish your project from the Build / Publish / Folder menu.
-
Via FTP, for example, copy the result of the local publication bin\Release\netcoreapp3.1\publish to the Azure folder site\wwwroot.
Once published, you cannot test this project yet, without creating a Bot Channel (below).
Bot Channels Registration
To be able to use this Bot, you have to create a Azure Bot Channels Registration :
- In Azure, add a service Bot Channels Registration.
- Bot handler: MyEchoBot-Channel
- Princing: F0 (Gratuit)
- Messaging endpoint: https://YOUR_URL.azurewebsites.net/api/messages
-
In the section Settings, copy the Microsoft App ID.
-
In the section Settings / Manage, add a new Client secrets and copy the generated value (App Password).
- Modify the file AppSettings.json hosted in the previous Web App and paste these two keys.
{
  "MicrosoftAppId": "1234abab-8a37-1234-85b2-5903ead01234",
  "MicrosoftAppPassword": "JDUDDZN5qD6LGQFT-.6Ozo3HYGR~hysh~c"
}
-
Restart the Web App to take these configuration settings into account.
-
Now you can test your Bot, via the section Test in Web Chat in the Bot Channel.
Configure the Teams channel
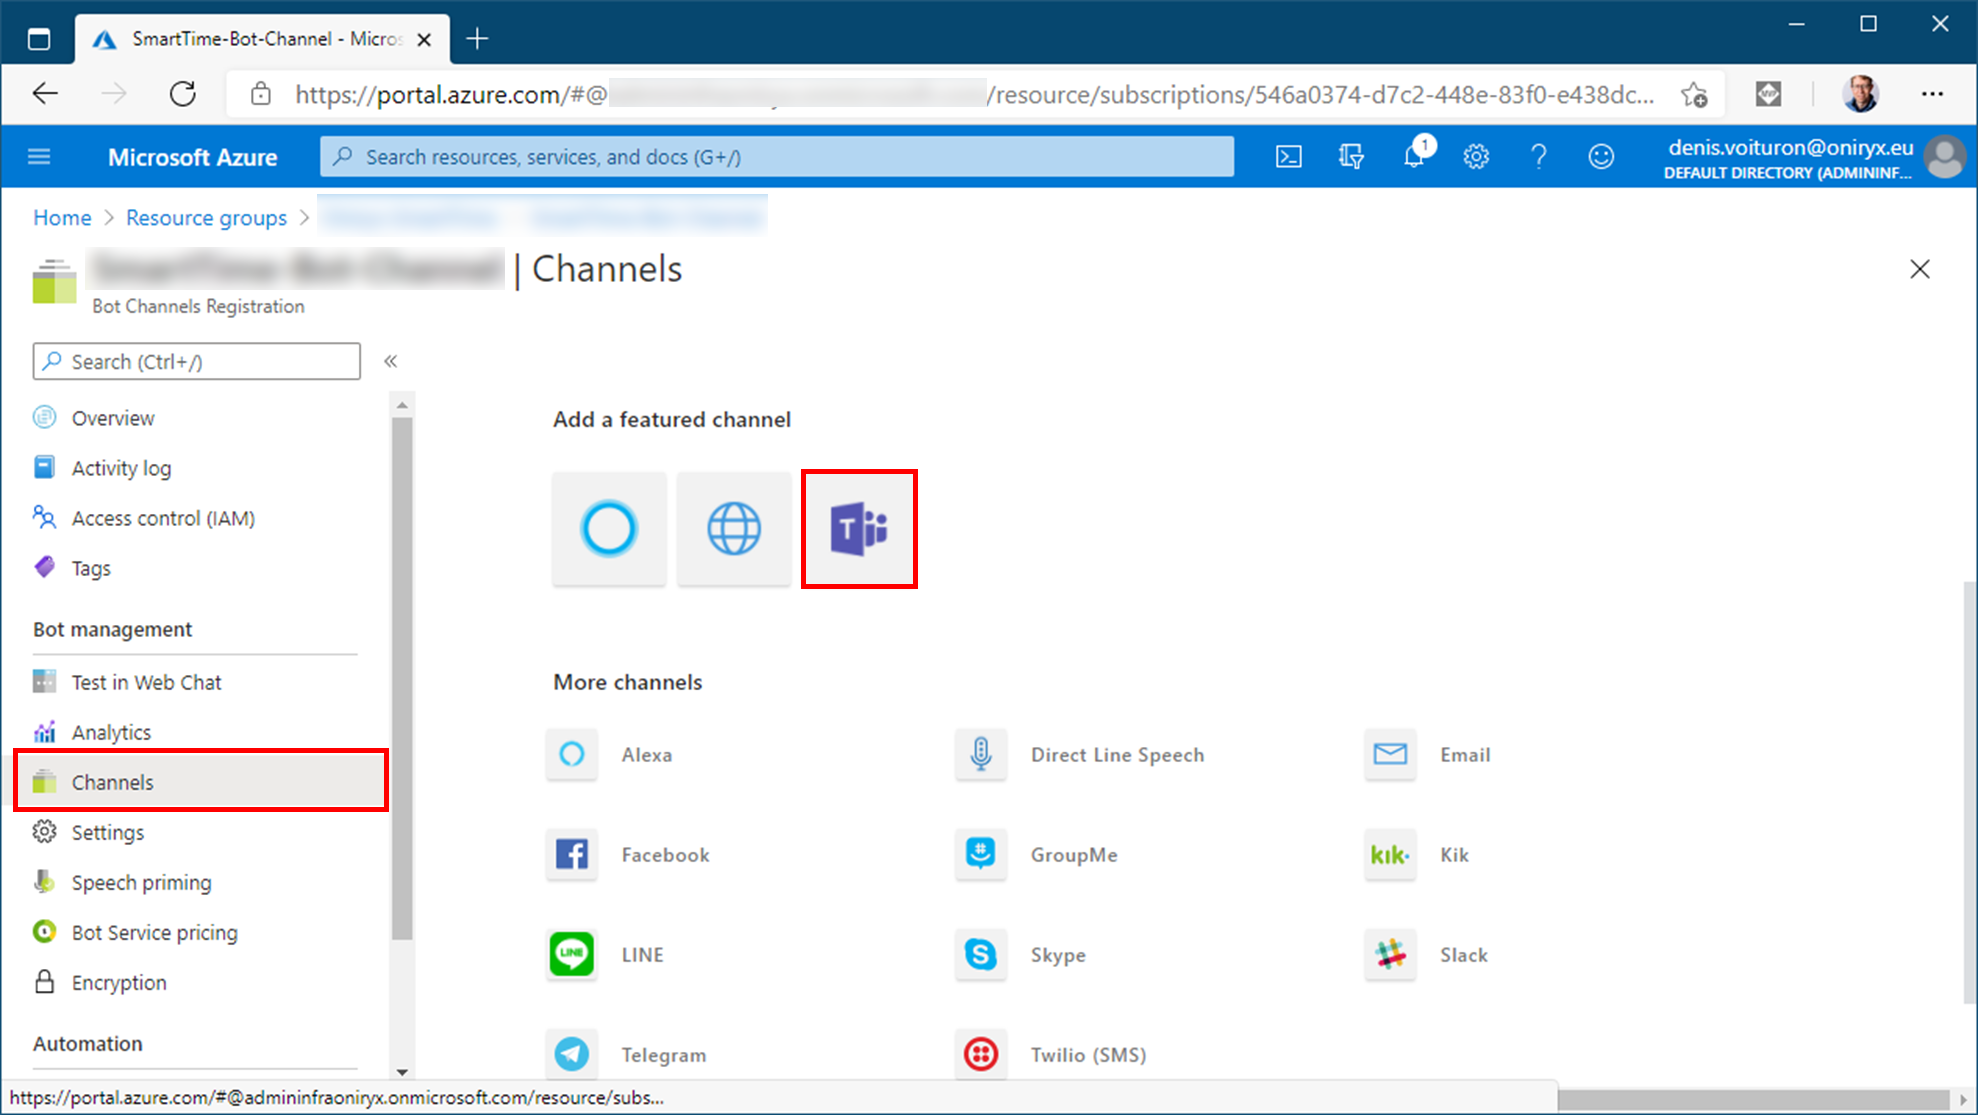
In Azure Bot Channel, configure the Teams channel.
-
Via the Channels section, add a Teams channel.
-
Click the Teams button and save the default settings (Messaging, Calling, Publish).
Create a deployment package for Teams
From your Teams application, install the App Studio application to configure a package to be deployed in your company’s Teams.
-
Install the application App Studio, from the Apps icon on the left bar.
-
From the Manifest Editor tab, create a new App.

- Fill in the details fields of the package :
- Short name: MyApp
- Full name: My application
- App ID: générez un nouvel ID
- Package name: exemple “com.dvoituron.teams.myapp”
- Version: 1.0.0
- Descriptions
- Developer information
- App URLs: https://dvoituron.com
-
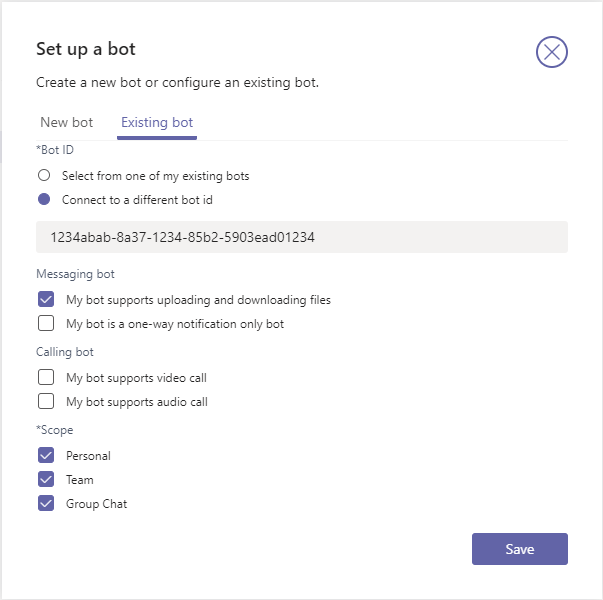
In the Capabilities section (left), create a new Bot.
- Select Existing Bot.
- Encode the Bot ID (MicrosoftAppId) retrieved from the Bot Channels Registration part above and copied into the AppSettings.json file.
-
Download the package to be deployed in your company’s Teams. This file is a ZIP containing the manifest (json) and the icons.
- In the section Finish / Test and distribute, click on the Download button.
Install the package in Teams
There are several ways to publish a package. Personally, I prefer the one that uses the Office 365 administration interface.
-
Login to the Teams administration portal : https://admin.teams.microsoft.com/.
-
In this Teams Admin Center, select the item Teams App / Manage Apps. and add the previously created package.
-
(Optional) In the Teams App / App Setup section, for the Global strategy, add this new application and make it accessible to all your users.
-
Each user can add this application through the Applications section of Teams and add it to chat with this Bot.
Resources
Cet article se base sur ces resources :